
Hexbreaker
Hexbreaker: How to create foliage!
Hello everyone! Welcome back to another devlog from our in development game, Hexbreaker. My name is Jackson and I am our lead 3D Environment Artist. This week I wanted to create a sort of walk-through or tutorial of how I created the foliage for our game. While I used Maya 2023, ZBrush 2022, and Adobe Substance Painter for creating these assets, any similar software with modeling, sculpting and painting abilities can be used. Let's get started!
Where to Start?
As with all asset creation pipelines, the process begins with collecting reference and developing an idea of what exactly is needed for the game you're working on. In Hexbreaker, we have three main environments that the character travels through, all of which are located in the sprit realm. There are the marsh, ruins, and cathedral areas. We decided that the cathedral didn't need foliage, the ruins need some grass and vines, and the marsh needs all sorts of grass, lilypads, cattails, ferns, and flowers. This tutorial covers the steps I went through to create the majority of the foliage assets used in our marsh environment.
Low Poly Models
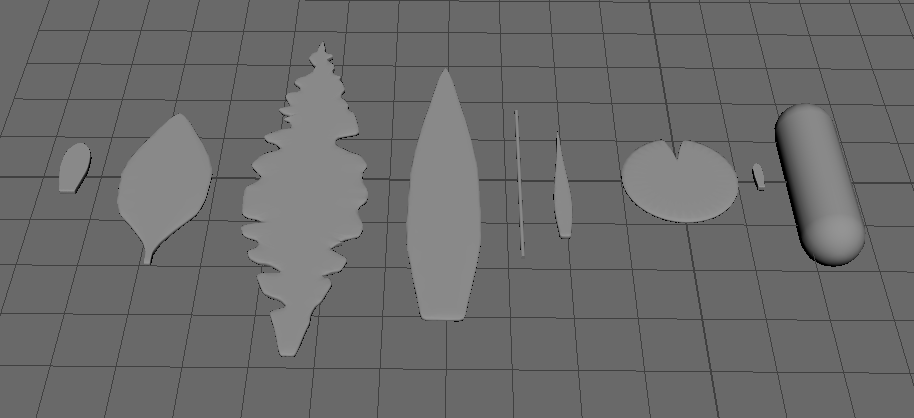
The process starts with the creation of low poly models of each piece of foliage that can later be sculpted on to create high poly versions. In Maya, I created the head, leaf and stem of the cattail, a lilypad, lotus petal, fern leaf, flower petal, and the leaf for the flower. These assets will end up as 2d cards, but for now, make sure the low poly versions have some depth to them. Getting the correct shape of each object is more important than proper geometry since they will be retopologized in ZBrush. After the objects are laid out how you want them, export them each as their own separate mesh. This allows easier manipulation in ZBrush.
Sculpting
Start by importing one of the meshes. Then you can import the rest using the MultiAppend tool within the SubTool Master menu in Zplugin.
From here, you will need to subdivide your meshes to add more geometry to work with. As long as smooth is turned off when you subdivide, the meshes should retain their original shape. The downside of doing this is that there will still be hard edges based on your low poly geometry. To fix this, using dynamesh and ZRemesher, the polygons of your meshes will be spread more evenly across the mesh, then you can use the smooth/polish brush or the polish modifier under the deformation menu to smooth out those hard edges.
Now that your meshes are smooth and have enough geometry to work with, you can begin sculpting. Since our game is more stylized, I chose to add detail to the models that would accompany that style. It would be possible to use these meshes to create more realistic foliage, but that wouldn't fit the art style of our game. Using the damStandard brush, I added veins to the leaves and flowers where they would be on actual leaves and flowers, but more pronounced and exaggerated. At this point, the models were still looking a little flat to me, so I added some variation to the surfaces using a stylized rock texture alpha brush. Not its intended use, but it gave me the results I was looking for.
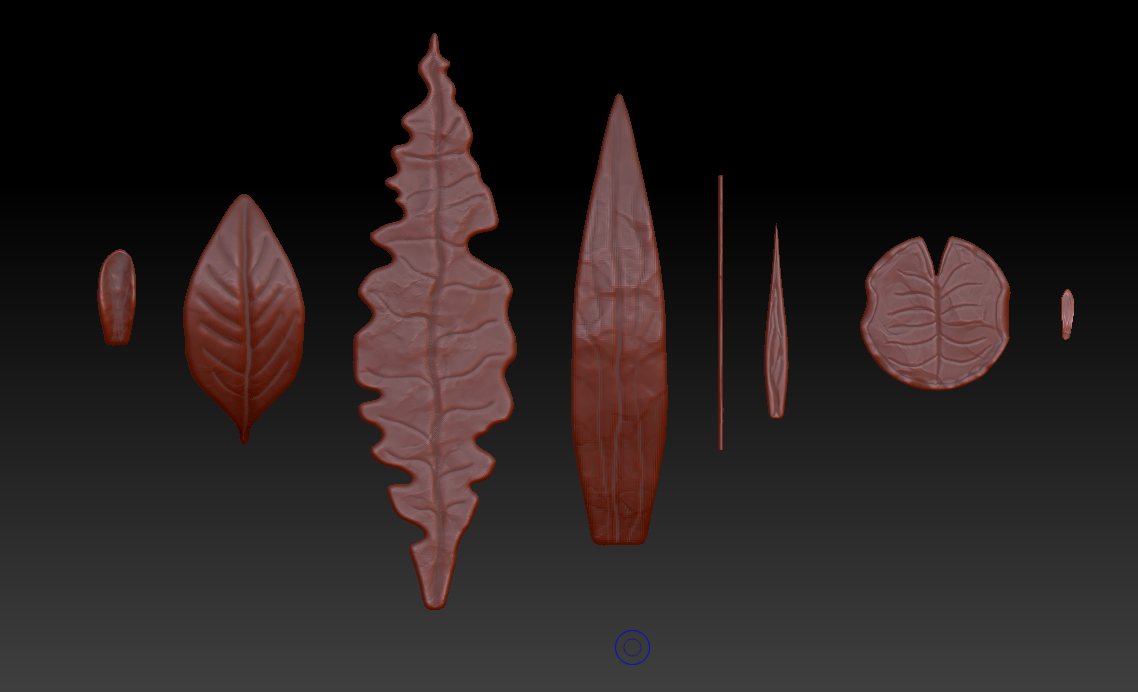
When you are happy with the high poly sculpts, you can use the export tool located right under the multiappend tool to move these models back over to Maya.
Preparing to Bake High to Low
Using the high poly models, I arranged them on a plane where the high poly detail will be baked. Before baking, I laid out the petals for the lotus and base flower to be in the shape of the actual flowers so the flower cards can be deformed as one piece instead of manipulating each petal later on. Typically, materials like this would be reserved for foliage cards only, but I wanted to put the cattail head on the material as well. I unwrapped the capsule and placed the UVs in the empty area to avoid any overlap. Before exporting, assign different colored materials to each high poly object so you can use a color ID map to mask out objects in Substance Painter.
Export the plane as the low poly object and all of the high poly objects as a single object to bake from.
Baking High to Low
In Substance Painter, bake the mesh maps using the plane as the low poly and the sculped meshes as the high poly. Turn diffusion all the way down before baking, ensure the bake radius captures the entirety of each high poly object and then bake!

The results should look close to this in the painting view.
Texturing
This is the most fun part in my opinion. While texturing you can experiment with all the tools Substance Painter has to offer, test different color schemes, and even hand paint textures if that's what you're going for. Since our game doesn't let the player inspect objects close up, I opted to focus mainly on colors and adding variation to the materials rather than trying to hand paint details that would most likely not be seen from afar.
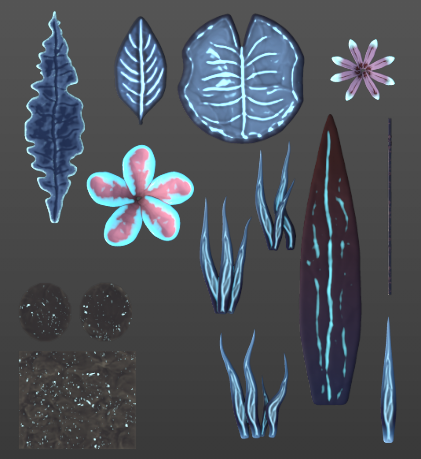
Before beginning to texture the foliage, it is critical to create an alpha map for what is visible or not on the material. Using a fill layer with it set to completely transparent, create a white mask with color selection, then choose each of the different pieces to ensure the background is transparent and the foliage is opaque. Once that's done, I created folders for each object using color selection to mask out the others. This allowed me to texture each piece individually without affecting the others. Using a variety of mask editors with generators, I manipulated the curvature of each object to apply color variation to crevices and edges. Since our game takes place in the spirit realm, we pictured the foliage to be bioluminescent in some way. To accomplish this, I made the light blue areas seen below emissive.
When you are happy with your textures, export them in whichever format you need for your game.
Setting up the Foliage Cards
Hopping back over to Maya, apply the textures you just created to the original plane in your scene. Ensure two sided lighting is turned on to view the textures in the scene.

At this point you're nearly there! Most of the difficult parts are done. All that's left is to cut out each card and deform and arrange them how you want. To begin, you need to take the multi-cut tool and cut around each individual object. When each is cut around, extract each one from the plane. When manipulating each object, turn on Preserve UVs for each tool you use or else any manipulation will lead to extreme distortion of the textures.

For objects that will need to be bent or twisted, make sure there is enough geometry to do so smoothly.
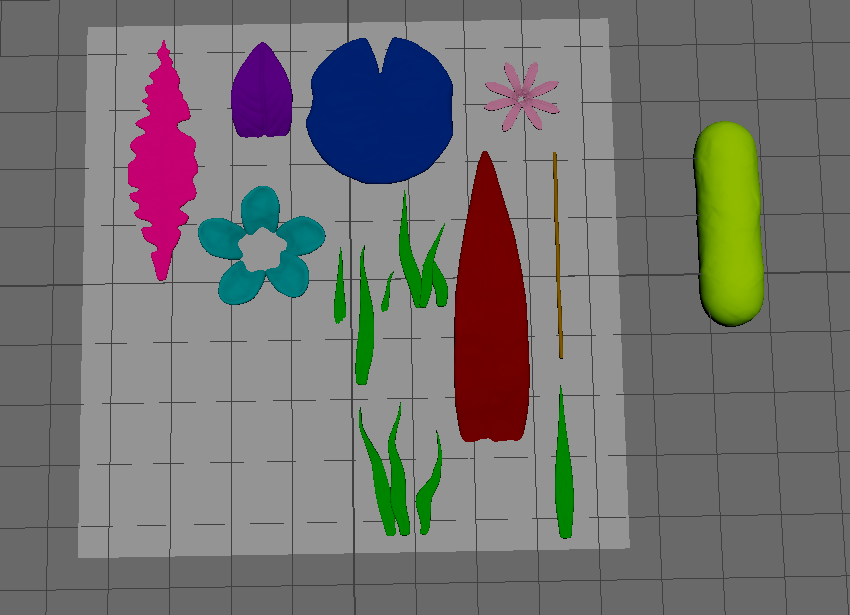
Finally, you can arrange the cards in groups to be a combined mesh to be used in game. For me, this meant bending flowers, leaves and grass, and duplicating and rotating objects until they are in positions I approve of.
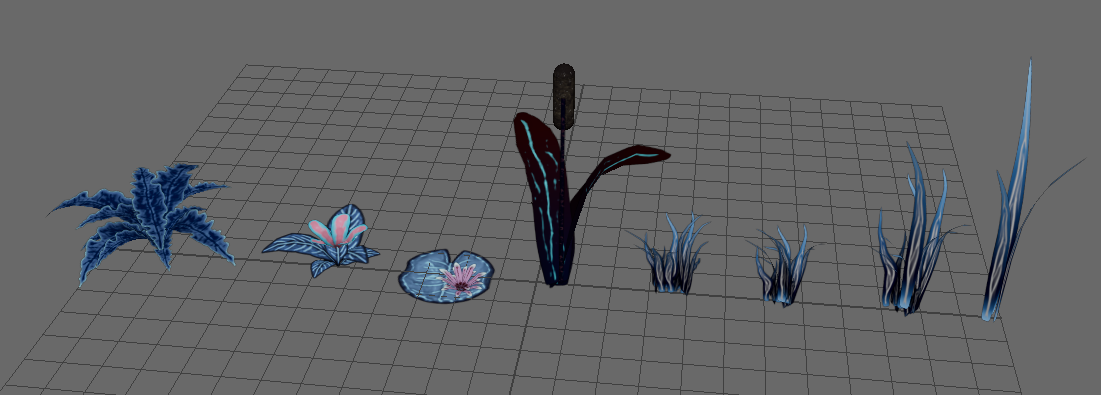
These are the finished results! After going through this process a couple times, it only takes about 2 hours depending on the complexity and detail required for your assets.
I hope this tutorial was helpful and informative! I learned this process pretty recently and I like how much variation you can bring to your plants this way. I still need to create vines and moss for our game, but at least I have the process down at this point. Be sure to look for more updates and how to posts from us in the future!
Thanks for reading,
Jackson
Leave a comment
Log in with itch.io to leave a comment.